It is not easy to look around a bathroom or hallway and suddenly see it as a series of risks instead of a familiar place. Many of us reach this point after a fall, a close call, or a new diagnosis. It can feel overwhelming to think about changing the home, even with something as simple as a grab bar. You are not alone in feeling that mix of worry, urgency, and maybe even a bit of sadness that these changes are needed now.
The short answer is that the right grab bar is one that matches the person’s strength, hand size, and balance needs, is securely mounted into wall studs (or an approved anchor), has a non-slip surface, and is placed exactly where the hand naturally reaches during a transfer or while walking. For most homes, that means 1.25″ to 1.5″ diameter bars, sturdy metal (usually stainless steel), textured or knurled finishes, and thoughtful placement near the toilet, shower, tub, and any step or doorway where someone feels unsteady.
Understanding What Grab Bars Really Do (And What They Cannot Do)
Before we talk about sizes, styles, and locations, it can help to pause and be very clear about the role of grab bars. Many families think of them as “only for elders” or “for people who cannot walk.” In reality, grab bars are quiet helpers for anyone whose strength, vision, balance, or reflexes are not as sharp as they once were, or for someone living with illness, pain, or fatigue.
Grab bars are not just about preventing falls; they are about giving people enough confidence and support to keep doing as much as they safely can on their own.
Grab bars can:
- Give a stable handhold when standing up or sitting down.
- Provide something firm to reach for when stepping over a tub edge or shower threshold.
- Offer steady support during dizzy spells, low blood pressure episodes, or fatigue.
- Help caregivers by giving them an anchor point to guide and support safely.
Grab bars cannot:
- Replace supervision or hands-on help for someone who is very unsteady or confused.
- Fully compensate for a very unsafe setup, like a steep, narrow staircase with poor lighting.
- Make up for poor installation. A poorly anchored bar can give a false sense of security and be dangerous.
The safest grab bar is one that both the person and the caregiver trust enough to actually use, every time it is needed.
Sometimes the emotional part is the hardest. A loved one might feel that grab bars are a sign of “losing independence.” It can be helpful to gently reframe them as tools that protect independence, rather than take it away.
Start With the Person, Not the Product
Before picking a bar from a catalog or a store shelf, it helps to picture the person using it on a real day, not a perfect day.
Ask yourself:
- Do they walk on their own, with a cane, or with a walker?
- Do they have weakness on one side (for example, after a stroke)?
- Do they have arthritis in their hands, wrists, or shoulders?
- Do they have vision loss or difficulty seeing contrast?
- Do they have memory problems that might affect how they use the bar?
- Are they small-framed, larger-bodied, very tall, or very short?
These answers will guide almost every choice, from the thickness of the bar to the exact angle and location. Two people could live in the same house, use the same bathroom, and still need different grab bar setups.
Key Features To Look For When Choosing Grab Bars
Grab bars look simple, but there are a few features that make a big difference in day-to-day use and safety.
1. Material and Weight Capacity
For most homes, stainless steel grab bars are the most reliable choice. They are strong, resist rust, and are widely available. Some bars are coated with a vinyl or plastic-like material for a warmer feel, which can be more comfortable for someone who is sensitive to cold.
You will often see a weight rating on packaging, such as “supports up to 250 lbs” or “supports up to 500 lbs.” Many building codes and guidelines expect bars to withstand at least 250 pounds of force. For someone who is larger-bodied, very unsteady, or tends to grab the bar hard when falling, it is wise to choose bars with higher ratings and to be extra careful about how they are installed.
The true strength of a grab bar comes from both the bar itself and the way it is anchored into the wall or structure behind it.
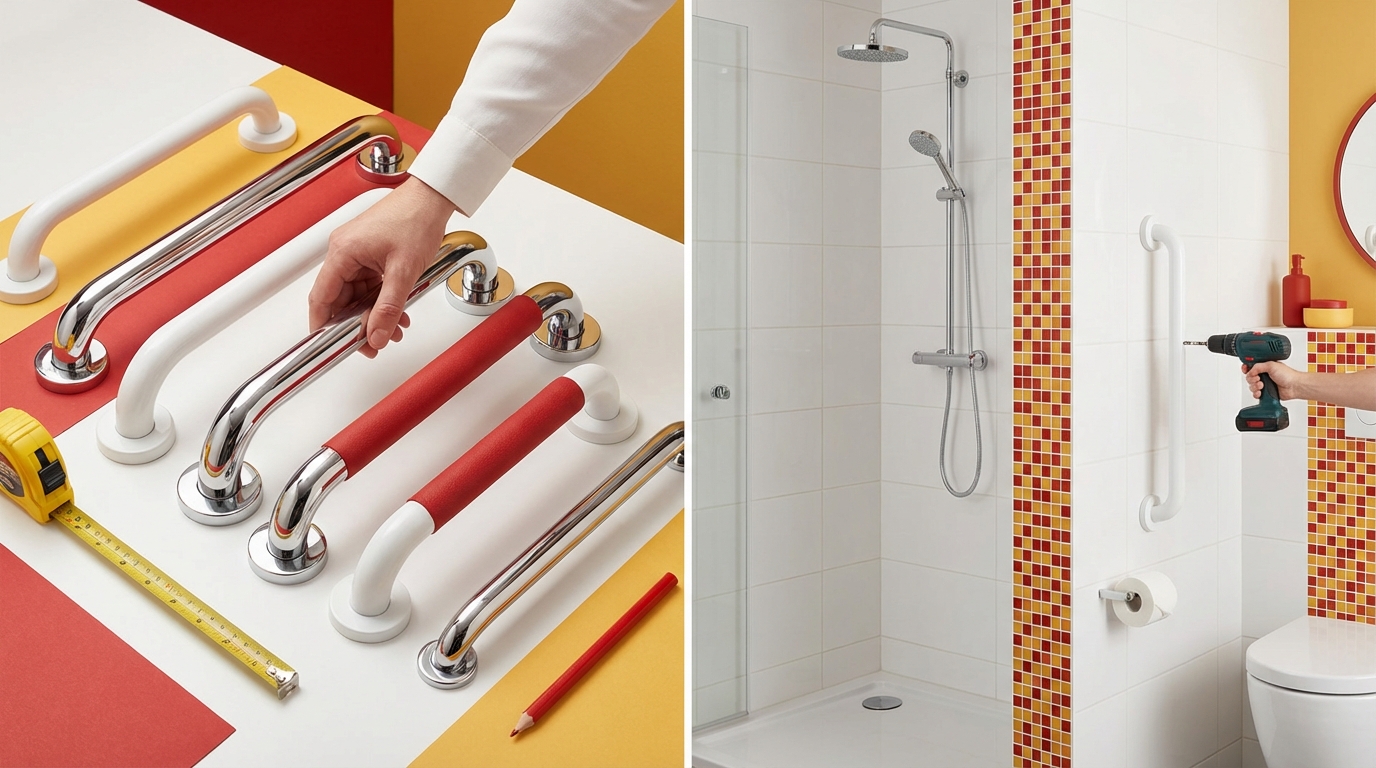
2. Diameter (Thickness) and Grip Shape
Most standard grab bars are between 1.25 inches and 1.5 inches in diameter. This range works for many adult hands and allows a firm hold without over-stretching the fingers.
Consider:
- Smaller hands or arthritis: A 1.25 inch bar can be easier to grip.
- Larger hands: A 1.5 inch bar might feel more natural.
- Very weak grip: A slightly smaller diameter or textured surface can make a big difference.
Some bars are straight, while others have gentle bends or “offset” shapes. Bent or offset bars can let the hand wrap in a more natural way when standing from a toilet or stepping into a tub.
3. Finish and Texture
Grab bars come in several finishes:
- Brushed or satin: Slightly dull, hides water spots and fingerprints, less slippery.
- Polished: Shiny, can look nice but may feel slick when wet.
- Textured or knurled: Small ridges or patterns that improve grip.
- Coated: Some bars have a soft-touch coating that can feel warmer and less harsh on the skin.
For bathrooms and any wet area, a brushed or textured bar is usually kinder and more secure. Someone with sweaty hands, neuropathy, or tremors may benefit from the most textured surfaces available.
4. Length of the Bar
Common lengths include 12, 16, 18, 24, 32, and 36 inches. Longer bars cover more area, but you also need enough solid structure behind the wall to mount them safely.
Here is a simple way to think about length:
| Location | Common Length Range | Purpose |
|---|---|---|
| Beside the toilet | 16 to 24 inches | Help with sitting and standing |
| Behind the toilet | 24 to 36 inches | Alternate grip and wheelchair transfers |
| Inside the shower (horizontal) | 24 to 36 inches | Steady walking and standing in shower |
| At shower entrance / tub edge | 18 to 24 inches (vertical or diagonal) | Help stepping in and out |
| Stairs / short steps | As long as possible along the step run | Continuous support along stairs |
5. Mounting Style: Screw-In vs Suction vs Clamp-On
This is an area where many caregivers feel torn. Quick, no-hole options are tempting, especially in rentals, but they come with real limits.
- Permanently mounted (screw-in) grab bars: Installed into wall studs or solid blocking behind the wall, using proper screws and sometimes special anchors. These are the safest and most secure for regular use and for real falls.
- Suction grab bars: Attach to smooth, non-porous surfaces like tile or glass. They are designed more as stabilizers than full weight-bearing bars. They can lose suction over time and must be checked often.
- Clamp-on tub bars: Attach over the rim of a bathtub with a clamping mechanism. They can help with stepping in and out, but they should not be used as the only support for very large forces or for someone who pulls hard sideways.
If someone truly relies on a grab bar to stop a fall or to stand up every day, a permanently mounted bar is usually the safest choice.
If you rent or live in housing where drilling into walls is complicated, it may help to talk with the landlord, a local occupational therapist, or a home modification program. Many communities have resources or grants to support safe installations.
6. ADA-Compliant vs “Household” Grab Bars
Bars labeled “ADA compliant” follow guidelines that are often used in public or commercial spaces. Features can include:
- Standard diameters (usually 1.25 to 1.5 inches).
- Firm weight-bearing ratings.
- Designs meant for horizontal or vertical placements at certain heights.
In a private home, you are not required to follow ADA rules, but they can be a helpful starting point. At the same time, home setups sometimes need adjustments, especially for very tall or very short people, or for those who transfer from wheelchairs.
Where To Install Grab Bars: Room-By-Room Guidance
Every home is different, but there are common “hot spots” where falls and near-misses often happen. It can help to walk through the home with the person, or to picture their daily routine, and notice where their hand naturally reaches out for support.
Ask: “Where do you feel nervous? Where do you reach for the wall, towel bar, door frame, or my arm?” Those are your priority spots for grab bars.
Grab Bars Around the Toilet
Standing up from and sitting down on the toilet can be difficult for many people living with arthritis, weakness, stroke, Parkinsons, or heart and lung conditions.
There are three common approaches:
- Wall-mounted bars beside the toilet: A horizontal bar on the wall next to the toilet is one of the most stable supports. The hand can slide along it while sitting or standing. Often installed about 33 to 36 inches above the floor (measured to the top of the bar), but this can be adjusted for height.
- Bar behind the toilet: A horizontal bar behind the toilet can help those who transfer from wheelchairs or who need to push straight up from behind. This can work well when there is no nearby side wall.
- Floor-to-wall or floor-to-ceiling poles: If there is no sturdy wall close enough, a vertical support pole (sometimes with a pivoting grab section) can be placed near the toilet.
Some people also use “toilet safety frames” that attach to the toilet itself, providing armrests on both sides. These can be helpful but are usually best as a supplement, not a full replacement for at least one well-mounted bar.
Placement Tips Around the Toilet
Here are some general ideas, which can be adjusted with help from a therapist or installer:
| Situation | Typical Placement Idea |
|---|---|
| Standard toilet next to a side wall | One horizontal bar on the wall, about 33 to 36 inches from floor, 12 to 18 inches long, starting a bit in front of the front edge of the toilet bowl. |
| No close side wall | One horizontal bar behind the toilet, 24 to 36 inches long, centered on the toilet, at about 33 to 36 inches from floor. |
| Weakness on one side (for example after stroke) | Place a strong bar on the stronger side, where the person can use it most naturally when standing or turning. |
Because body sizes and toilet heights vary, it often helps to have the person do a few gentle practice stands with you, marking the wall with painter’s tape where their hand feels most comfortable.
Grab Bars in the Shower
Showers combine several risks: water, soap, slick surfaces, and often small spaces. Many of us think first of a single bar at the shower entrance, but that is only part of the picture.
Consider two needs:
- Entering and exiting the shower.
- Standing, turning, and reaching while inside the shower.
For a walk-in shower, a common setup includes:
- Vertical bar near the entrance: Helps when stepping over a small lip or threshold. Often 18 to 24 inches long, mounted so the lower end is near hip height and the upper end near shoulder height.
- Horizontal bar on the long wall: Often 24 to 36 inches long, placed at about 33 to 36 inches from the floor, to give steady support while standing and turning under the water.
If there is a shower seat, consider:
- A horizontal bar just above the seat height so the person can push to stand.
- A vertical or diagonal bar nearby for extra security when rising.
Grab Bars in the Bathtub/Shower Combination
Stepping over a bathtub edge is one of the most common times for slips. There is often no good place to hold, so people grab towel bars, shower doors, or the faucet, none of which are designed to hold body weight.
Helpful placements can include:
- Vertical bar at the tub entry: Near the outer edge, where the person first steps in. The lower end near the tub rim, the top end near shoulder height. This helps with the “in” and “out” step.
- Diagonal bar inside the tub/shower wall: Running from lower near the faucet end up toward the back wall, giving options for both standing and lowering into the tub.
- Horizontal bar along the wall: For use when standing under the shower or if someone uses a bath seat.
A towel bar, shower door frame, or soap dish is never a safe substitute for a properly mounted grab bar.
Clamp-on tub grab bars can be helpful for someone who still has fair balance but just needs an extra handhold. They must be checked often, because tub walls can be curved or thin, and the clamp can loosen over time.
Grab Bars Near Steps, Stairs, and Thresholds
We often think of stair railings as separate from grab bars, but for someone with limited balance, any step or change in floor height may need extra support.
Consider:
- A sturdy handrail on both sides of any full staircase, if possible.
- A short grab bar near a single step into a sunken living room, porch, or garage.
- A vertical grab bar or support pole near a tricky threshold or doorway, especially if the person uses a walker or cane.
Some families add a grab bar inside the entryway, near the door, to help with putting on and taking off shoes or boots, or with steadiness while locking or unlocking the door.
Grab Bars in Other Key Spots
Depending on the home and the person, grab bars can help in a few less obvious places:
- Beside the bed: For someone who struggles to stand up from low beds or who gets dizzy when rising.
- In hallways: Long hallways can feel safer with a continuous bar or a series of short bars, especially for someone with very poor balance but who does not want to move to a walker yet.
- Near favorite chairs: Some recliners or soft couches sit very low. A nearby grab bar or support pole can help with standing without relying on armrests that may not be strong or stable enough.
The main guide is to pay attention to where hands reach out. If the same corner, wall, or piece of furniture is touched over and over for steadiness, that is a likely place for support.
How High Should Grab Bars Be?
This is one of the most common questions, and there are general guidelines, but no perfect number for every person.
Many safety standards and public guidelines suggest mounting grab bars between 33 and 36 inches from the finished floor to the top of the bar. In a home, you can adjust within or even slightly outside this range to fit the person.
A simple way to personalize height:
- Have the person stand in their usual shoes on a stable surface by the wall where the bar might go.
- Ask them to pretend they are about to sit or stand and to reach for the wall where they would naturally place their hand.
- Mark that spot with removable tape.
- Repeat this a few times, both for sitting and standing motions.
Look at where the marks cluster. That range often gives you a better idea than a fixed rule alone. For someone in a wheelchair, the hand position when transferring is more important than standing height, so you may need lower placements than typical.
Common Types of Grab Bars and When They Help Most
It can be helpful to match daily challenges with bar styles that fit those exact needs.
Straight Horizontal Bars
These are the standard bars most of us picture.
Best for:
- Steady support along a wall in showers and tubs.
- Support beside or behind the toilet.
- Hallways and corridors.
Placing them slightly forward of where someone stands up allows the body to lean slightly forward when rising, which is safer than pulling straight up.
Vertical Bars
Vertical bars give a different angle of support and often help with pull-to-stand motions.
Best for:
- Entrances to showers and tubs, near the doorway or lip.
- Near steps or single-stair transitions.
- For people who lack arm strength to push down, but can pull themselves upward.
Because a vertical bar can be used along its full length, people of different heights in the same home can share one more comfortably.
Diagonal Bars
Diagonal bars are set at an angle, often leaning up toward the front of the motion.
Best for:
- Across tub walls, where people both sit and stand.
- Beside seats or benches, where multiple hand heights are needed.
- People with limited shoulder movement, who cannot comfortably grip a high horizontal bar.
One caution: The hand can sometimes slide down a diagonal bar if it is very smooth and wet. Using a textured or knurled diagonal bar reduces this risk.
Flip-Up and Fold-Down Bars
These bars mount to a wall or floor and can be raised out of the way when not in use. They are often used near toilets where wall space is limited or where both sides need support.
Best for:
- Narrow bathrooms where regular side bars would block access.
- Homes where multiple users need different setups, such as a wheelchair user and an ambulatory partner.
Because these bars rely on hinges and locking mechanisms, choosing high-quality products and correct installation is especially important.
Floor-to-Ceiling Poles and Transfer Poles
These are tension-mounted or bolted poles that run from floor to ceiling, sometimes with rotating or fixed grab sections.
Best for:
- Beside beds, couches, or toilets without a close, sturdy wall.
- People who transfer frequently throughout the day and want a strong central support.
Installation must follow the manufacturer’s guidance carefully. A poorly tensioned pole can shift, which is very unsafe.
Installation Basics: Safety From the Inside Out
Many caregivers are handy and feel comfortable with home projects, but grab bars are one area where careful, precise work matters deeply. A bar that looks fine on the wall but pulls out during a fall can cause serious harm.
If there is any doubt about installation, we are often safer asking for help from a professional who knows how to find studs, use proper anchors, and understand local building codes.
Anchoring Into Studs or Solid Backing
The strongest grab bars are attached directly into wall studs or solid blocking behind the wall.
Key points:
- Use a stud finder to locate studs and mark their edges.
- Most studs are 16 inches apart on center, but older homes may differ.
- If the bar does not line up perfectly with studs, special mounting plates or backing may be needed inside the wall.
For tiled bathrooms, drilling through tile requires special bits and careful technique to avoid cracks. This alone is a reason many families choose to hire an installer.
Anchors, Screws, and Load Ratings
Most grab bars come with recommended screws or anchors. For safe mounting:
- Use stainless steel or other rust-resistant hardware.
- Follow the bar manufacturer’s guidelines for screw length and type.
- Use anchors that are rated for the loads a grab bar may experience, not light-duty wall anchors meant for pictures or small shelves.
In some walls, such as those with metal studs, special anchors or full-length mounting plates may be needed.
Checking and Maintaining Grab Bars
Once installed, grab bars should not be “set and forgotten.”
Every few weeks, it can help to:
- Give the bar a firm tug in different directions to check for movement.
- Look for any looseness in mounting flanges or screws.
- Check sealant around bars in wet areas to prevent water damage behind walls.
Encourage your loved one to tell you if they ever feel a bar shift or wiggle, even slightly.
Balancing Safety, Dignity, and Appearance
One quiet challenge of grab bars is that they can remind people of illness, aging, or disability every time they see them. Some family members may resist them at first for this reason.
There are ways to soften this:
- Choose finishes that match the bathroom: Brushed nickel or bronze finishes can blend with existing fixtures.
- Consider “designer” grab bars: Some products look more like towel bars or decorative rails but are rated as grab bars.
- Place bars thoughtfully: Set them where they are clearly handy, but not cluttering every surface, so the space still feels like home.
Sometimes it helps to frame grab bars the same way we do eyeglasses or walking shoes. We use tools that help us live well, not because we have failed, but because we are taking good care of ourselves.
When To Involve a Professional (Therapist or Installer)
There are moments when outside help can save time, money, and stress.
You might find it helpful to call in an occupational therapist or experienced installer when:
- The person has complex medical needs, such as advanced Parkinsons, stroke with one-sided weakness, or severe arthritis.
- The bathroom layout is tight, unusual, or involves many angles and steps.
- You are unsure where exactly to place bars, even after observing daily routines.
- You rent, live in a multi-unit building, or need permission for wall changes.
Occupational therapists can watch how a person transfers in and out of the shower, on and off the toilet, and in and out of bed, and then suggest very specific placements and products.
Many communities also have home modification programs through aging services, veterans programs, or disability organizations. Some offer free or low-cost assessments and installations.
Questions To Ask Before You Buy or Install
To end with something practical you can use right away, here are questions we can walk through before choosing grab bars:
- Where have there already been falls, stumbles, or “near misses” in the home?
- Where does the person already reach out for support, even if nothing safe is there yet?
- Does the person have a stronger and weaker side? Which side should the main support be on?
- How strong is their grip? Do they need smaller diameter or textured bars?
- Are there vision issues? Would a contrasting color bar be easier to see against the wall?
- Is this a home you own, or a rental where drilling is limited?
- Who will install the bars, and do they understand the need to anchor into studs or use rated anchors?
The goal is not to turn the home into a clinic, but to quietly weave in enough support so that daily routines feel safer, calmer, and less tiring for everyone involved.
When we choose grab bars thoughtfully, we are not just adding hardware. We are giving our loved ones a way to keep standing at the sink, stay steady in the shower, or reach the toilet in time, with less fear of falling. That kind of steadiness ripples through the whole day, for the person and for the caregiver who loves them.